Hey there! I'm a supplier of robot shafts, and I've seen firsthand how crucial it is to install a robot shaft correctly. A proper installation not only ensures the smooth operation of the robot but also extends the lifespan of the shaft. In this blog, I'll walk you through the step-by-step process of installing a robot shaft correctly.
Step 1: Preparation
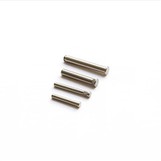
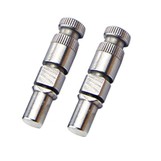
Before you start the installation process, it's essential to gather all the necessary tools and materials. You'll need a set of wrenches, a torque wrench, a micrometer, a dial indicator, and of course, the robot shaft you'll be installing. Make sure the shaft is the correct size and specifications for your robot. You can refer to the Robot Main Shaft on our website to find the right one for your needs.
Inspect the shaft for any damage or defects. Look for scratches, dents, or any signs of wear and tear. If you notice any issues, contact your supplier immediately to get a replacement. It's also a good idea to clean the shaft and the mating surfaces to remove any dirt, debris, or grease.
Step 2: Remove the Old Shaft (if applicable)
If you're replacing an old shaft, you'll need to remove it first. Start by disconnecting the power supply to the robot to prevent any accidental activation. Then, use the appropriate wrenches to loosen and remove the bolts or fasteners that hold the shaft in place. Be careful not to damage the surrounding components.
Once the bolts are removed, gently pull the old shaft out of the robot. Pay attention to the orientation and position of the shaft, as you'll need to install the new shaft in the same way. Inspect the old shaft for any signs of damage or excessive wear. This can give you valuable insights into the cause of the problem and help you prevent similar issues in the future.
Step 3: Check the Mating Surfaces
Before installing the new shaft, carefully inspect the mating surfaces on the robot and the shaft. These surfaces should be clean, smooth, and free of any damage or debris. Use a micrometer to measure the diameter of the shaft and the bore of the mating component to ensure a proper fit. The tolerance should be within the specified range for your robot.

If the mating surfaces are not clean or smooth, you can use a fine-grit sandpaper to gently sand them down. Make sure to remove any burrs or rough edges. After sanding, clean the surfaces again to remove any dust or debris.
Step 4: Install the Shaft
Now it's time to install the new shaft. Apply a thin layer of lubricant to the shaft and the mating surfaces to reduce friction and make the installation easier. Carefully align the shaft with the bore of the mating component, making sure it is inserted in the correct orientation.
Use a press or a hammer and a block of wood to gently tap the shaft into place. Be careful not to apply too much force, as this can damage the shaft or the mating component. Once the shaft is fully inserted, use the torque wrench to tighten the bolts or fasteners to the specified torque value. This is crucial to ensure a secure and proper installation.
Step 5: Check the Alignment
After installing the shaft, it's important to check the alignment to ensure that the shaft is running straight and true. Use a dial indicator to measure the runout of the shaft. The runout should be within the specified tolerance for your robot. If the runout is too high, you may need to adjust the alignment of the shaft or the mating component.
To adjust the alignment, you can use shims or spacers to correct any misalignment. Make small adjustments and recheck the alignment until it is within the acceptable range. This step is critical to prevent premature wear and damage to the shaft and other components.
Step 6: Test the Robot
Once the shaft is installed and aligned correctly, it's time to test the robot. Reconnect the power supply and turn on the robot. Observe the operation of the shaft and the surrounding components. Listen for any unusual noises or vibrations, which could indicate a problem with the installation.
If you notice any issues during the test, stop the robot immediately and investigate the cause. It could be a problem with the alignment, the lubrication, or the installation itself. Make the necessary adjustments and retest the robot until it is operating smoothly.
Step 7: Maintenance
Proper maintenance is essential to ensure the long-term performance and reliability of the robot shaft. Regularly inspect the shaft and the surrounding components for any signs of wear, damage, or contamination. Check the lubrication levels and replenish as needed.
Follow the manufacturer's recommended maintenance schedule for your robot. This may include tasks such as cleaning, lubrication, and alignment checks. By performing regular maintenance, you can prevent premature wear and damage to the shaft and extend its lifespan.
Conclusion
Installing a robot shaft correctly is a critical process that requires careful attention to detail. By following these steps, you can ensure a proper installation and avoid common problems such as misalignment, premature wear, and damage to the shaft and other components.
If you have any questions or need further assistance with installing a robot shaft, don't hesitate to contact us. We're a leading supplier of robot shafts, and we're here to help you find the right solution for your needs. Whether you're looking for a Robot Main Shaft or any other type of robot shaft, we've got you covered.
So, if you're in the market for a high-quality robot shaft or need advice on installation and maintenance, reach out to us today. We look forward to working with you and helping you keep your robots running smoothly.
References
- Manufacturer's installation and maintenance manuals for your robot
- Industry standards and best practices for robot shaft installation