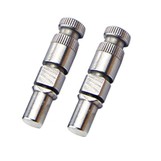
As a hard chrome shaft supplier, I often encounter inquiries from customers regarding the disassembly process of hard chrome shafts. Understanding this process is crucial for maintenance, repair, and even customization purposes. In this blog post, I'll walk you through the step - by - step disassembly process of a hard chrome shaft.
Preparation
Before starting the disassembly, it's essential to gather all the necessary tools and create a safe working environment. The tools you'll need typically include wrenches, screwdrivers, pliers, a bearing puller (if the shaft has bearings), a clean workbench, and safety equipment such as gloves and goggles.
First, ensure that the equipment where the hard chrome shaft is installed is powered off and disconnected from any power sources. This is a basic safety measure to prevent any accidental start - up during the disassembly process.
Next, clean the area around the shaft. Remove any dirt, debris, or grease that may have accumulated on the surface. This not only makes the disassembly easier but also helps in preventing contaminants from entering the internal components during the process.
Removing External Components
The first step in the disassembly is to remove any external components attached to the hard chrome shaft. This may include couplings, pulleys, gears, or other accessories.
For couplings, use the appropriate wrenches to loosen the bolts that hold the coupling halves together. Carefully separate the coupling halves and set them aside. If the coupling is a keyed type, note the position of the key so that it can be reinstalled correctly later.
Pulleys and gears are often held in place by set screws or keys. Use a screwdriver or a wrench to loosen the set screws. If there is a key, gently tap it out using a small hammer and a punch. Once the set screws or keys are removed, the pulley or gear can be slid off the shaft.
Bearing Removal
If the hard chrome shaft has bearings, special care is required during the removal process. Bearings are precision components, and improper removal can cause damage.
First, identify the type of bearing and the method of installation. Some bearings are press - fit onto the shaft, while others may be held in place by snap rings or other retaining mechanisms.
If the bearing is press - fit, a bearing puller is usually the best tool for removal. Place the bearing puller jaws around the inner race of the bearing and gradually tighten the puller until the bearing is pulled off the shaft. Make sure to apply even pressure to avoid damaging the bearing or the shaft.
If there is a snap ring holding the bearing in place, use a pair of snap ring pliers to remove the snap ring. Once the snap ring is removed, the bearing can be slid off the shaft.
Sealing and Gasket Removal
Hard chrome shafts often have seals and gaskets to prevent the leakage of lubricants and the entry of contaminants. These seals and gaskets need to be removed carefully.

Use a flat - bladed screwdriver or a seal removal tool to pry the seals out of their grooves. Be careful not to damage the shaft or the housing during this process. Gaskets can usually be removed by gently peeling them off the mating surfaces.
Shaft Removal
Once all the external components, bearings, seals, and gaskets have been removed, the hard chrome shaft can be removed from the housing.
In some cases, the shaft may be held in place by bolts or other fasteners. Use the appropriate tools to remove these fasteners. Then, carefully slide the shaft out of the housing. If the shaft is stuck, do not use excessive force. Instead, try to identify the cause of the sticking, such as corrosion or misalignment, and address it accordingly.
Inspection and Cleaning
After the hard chrome shaft has been disassembled, it's important to inspect each component for damage, wear, or other issues. Check the shaft surface for any signs of scratches, dents, or chrome plating damage. Inspect the bearings for signs of wear, such as pitting or rough surfaces. Examine the seals and gaskets for any signs of damage or deterioration.
Clean each component thoroughly using a suitable cleaning agent. For the hard chrome shaft, a mild solvent can be used to remove any remaining grease or dirt. Use a soft brush to clean the surface gently. For bearings, use a specialized bearing cleaner to ensure that all contaminants are removed.
Reassembly Considerations
While this blog focuses on the disassembly process, it's also important to briefly mention some reassembly considerations. When reassembling the hard chrome shaft, make sure to follow the reverse order of disassembly. Use new seals and gaskets to ensure proper sealing. Apply the appropriate amount of lubricant to the bearings and other moving parts.
It's also crucial to ensure that all components are installed correctly and that the shaft is properly aligned. Improper reassembly can lead to premature wear, reduced performance, and even equipment failure.
Conclusion
The disassembly process of a hard chrome shaft requires careful planning, the right tools, and attention to detail. By following the steps outlined in this blog post, you can safely and effectively disassemble a hard chrome shaft for maintenance, repair, or customization purposes.
If you are in the market for high - quality Hard Chrome Linear Shaft, we are here to help. Our hard chrome shafts are manufactured to the highest standards, ensuring durability and performance. Whether you need a standard size or a custom - made shaft, we can provide you with the perfect solution.
If you have any questions about our products or the disassembly process, feel free to contact us. We are always ready to assist you with your procurement needs and provide you with professional advice.
References
- Machinery's Handbook, 31st Edition
- Bearing Installation and Maintenance Guide, SKF
- Industrial Shaft Design and Maintenance Manual, McGraw - Hill