As a drive shaft supplier, I often encounter customers who are interested in understanding how to perform maintenance tasks on their drive shafts. One common repair that many DIY enthusiasts and professional mechanics might need to undertake is replacing a universal joint on a drive shaft. In this blog post, I'll walk you through the process step by step, sharing my insights and experience in the field.
Understanding the Universal Joint
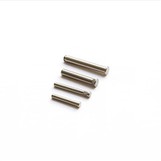
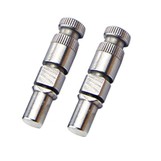
Before we dive into the replacement process, it's essential to understand what a universal joint is and why it's crucial for your drive shaft. A universal joint, also known as a U-joint, is a flexible coupling that allows the drive shaft to transmit torque at an angle. It consists of two yokes connected by a cross-shaped piece with needle bearings at each end. Over time, these needle bearings can wear out, leading to play in the joint, vibration, and eventually, failure.
Tools and Materials You'll Need
- Socket set and wrenches
- Hammer
- Vice grips or a press
- New universal joint
- Grease
- Safety glasses and gloves
Step 1: Prepare Your Workspace
Safety is paramount when working on any vehicle component. Start by parking your vehicle on a level surface and engaging the parking brake. If you're working on a rear-wheel-drive vehicle, you may need to jack up the rear end and support it with jack stands. Make sure to follow all safety procedures and use appropriate safety gear, such as safety glasses and gloves.

Step 2: Remove the Drive Shaft
The next step is to remove the drive shaft from the vehicle. This typically involves removing the bolts that connect the drive shaft to the transmission and the differential. Use a socket set and wrenches to loosen and remove these bolts. Once the bolts are removed, carefully slide the drive shaft out of the vehicle. Be mindful of any electrical connections or other components that may be attached to the drive shaft.
Step 3: Inspect the Drive Shaft
Before installing the new universal joint, it's a good idea to inspect the drive shaft for any signs of damage or wear. Look for cracks, dents, or other signs of abuse. Check the yokes for any signs of wear or damage. If you notice any issues, it may be necessary to replace the drive shaft or have it repaired by a professional.
Step 4: Remove the Old Universal Joint
To remove the old universal joint, you'll need to use a hammer and a punch or a press. If you're using a hammer and a punch, place the drive shaft in a vice or on a sturdy workbench. Use the punch to drive out the bearing caps on one side of the universal joint. Once the bearing caps are removed, you can remove the cross-shaped piece from the yokes. Repeat this process on the other side of the universal joint.

If you're using a press, place the drive shaft in the press and align the press with the bearing cap. Slowly apply pressure to the press until the bearing cap is removed. Repeat this process on all four bearing caps.
Step 5: Install the New Universal Joint
Before installing the new universal joint, make sure to lubricate the needle bearings with grease. Place the cross-shaped piece of the new universal joint into one of the yokes and align the bearing caps with the holes in the yokes. Use a hammer and a punch or a press to install the bearing caps. Make sure the bearing caps are fully seated and that the snap rings are in place.
Repeat this process on the other side of the universal joint. Once the new universal joint is installed, check to make sure it rotates freely and that there is no play in the joint.
Step 6: Reinstall the Drive Shaft
Once the new universal joint is installed, it's time to reinstall the drive shaft. Carefully slide the drive shaft back into the vehicle and align the bolts with the holes in the transmission and the differential. Use a socket set and wrenches to tighten the bolts to the manufacturer's specifications.
Step 7: Test the Drive Shaft
After reinstalling the drive shaft, it's important to test it to make sure it's working properly. Start the vehicle and let it idle for a few minutes. Then, shift the vehicle into gear and slowly drive forward and backward. Listen for any unusual noises or vibrations. If you notice any issues, stop the vehicle immediately and inspect the drive shaft again.
Conclusion
Replacing a universal joint on a drive shaft is a relatively straightforward process that can be done with basic tools and some mechanical knowledge. By following the steps outlined in this blog post, you can save money on labor costs and keep your vehicle running smoothly.
As a drive shaft supplier, we offer a wide range of high-quality drive shafts, including Precision Drive Shaft and Stainless Steel Drive Shaft. If you're in need of a new drive shaft or have any questions about drive shaft maintenance, please don't hesitate to contact us. We're here to help you find the right solution for your needs.
References
- "Automotive Drive Shaft Service Manual" - Manufacturer's Manual
- "How to Replace a Universal Joint" - Online DIY Guide